Installing Feren OS
Opening the installer
To start installing Feren OS you will want to run the installer. The installer is located in the following locations:
The Install Feren OS shortcut placed on the desktop
Step 1: Launch the installer
Once you have the installer opened up you should see a screen similar to the one shown in the below image:

Feren OS’s installer
Now that you are in the installer, select your language using the dropdown menu at the bottom of the window and then press Next.
Step 2: Select your location
You should now see a location select screen. From here either click where you are on the world map or use the dropdown menus below the map to select your region and zone.
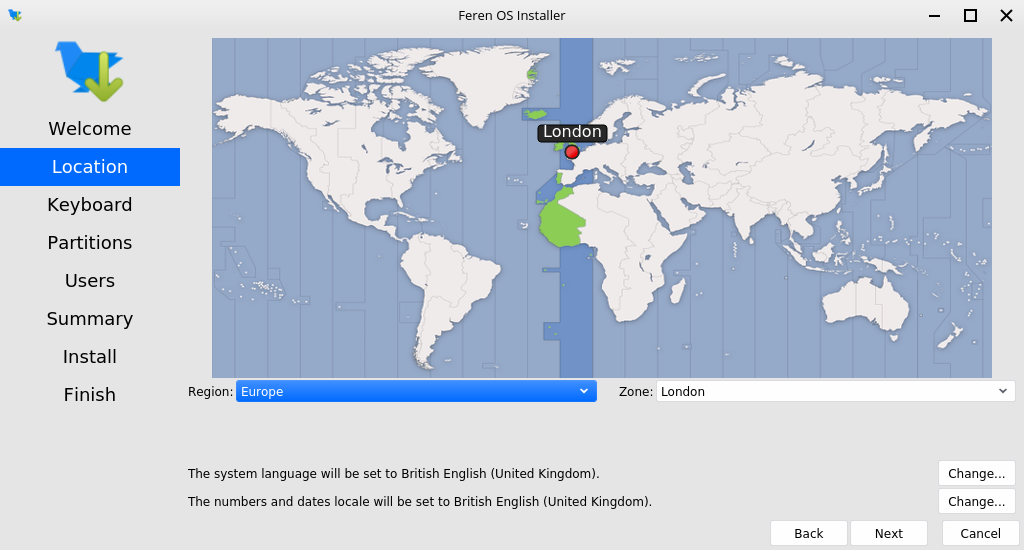
Once you’ve set your location click Next again.
Step 3: Select your keyboard layout
You should now see a keyboard layout selection screen. From here select your computer’s keyboard layout and, using the “Type here” textbox at the bottom-left, try each key on your keyboard to make sure they match.
Once you’ve set your keyboard layout click Next again.
Step 4: Replace the free space beside Microsoft Windows
Now you’ll have the option to either erase your disk, replace a partition with Feren OS, install Feren OS alongside your current Operating System or partition Feren OS manually.
Warning
Be sure to check the dropdown menu at the top of this screen to make sure it has selected the correct disk to install Feren OS onto. Better safe than sorry.
Select Replace a partition, click the free space you made in Disk Management, to the right of Microsoft Windows’s partition, from the “Current” partition bar at the bottom of the window and then click Next.
Warning
Make sure you select the free space and not an existing partition to replace!

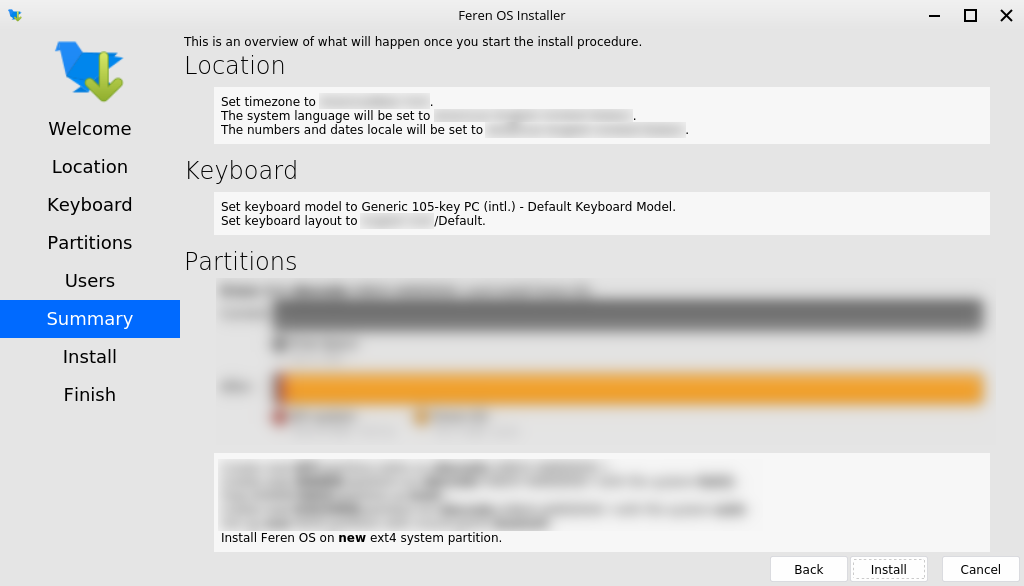
Step 5: Confirmation
You’ll now be taken to a page that summarises what will be done during installation. This will allow you to look over what you have chosen for your new Feren OS installation before installation begins.
Once you’re sure you’ve got everything correct, click Install and then Install now on the final confirmation dialog.
Warning
Once you have hit Install now there is no going back to change the installation settings. Make sure you’ve got everything just the way you want it before you confirm beginning the installation.
Wait until complete
Feren OS will now be installed. Have a cup of coffee or something as Feren OS will take a little while to install onto your machine.
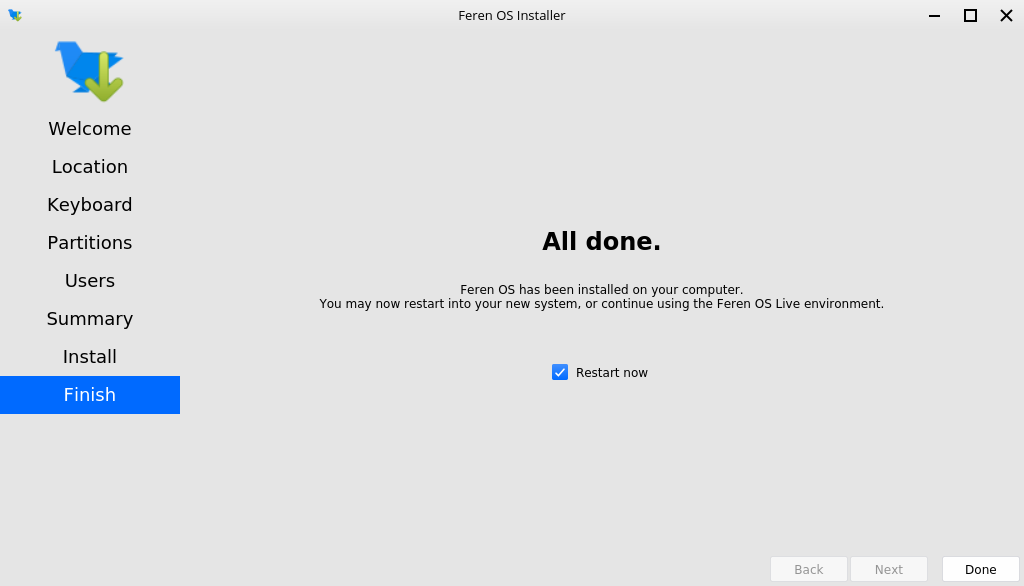
Once Feren OS has finished installing, it will take you to a screen saying “All Done”. From here you can choose whether you want to immediately restart into your new Feren OS installation when you click Done or not.

Congrats, you have installed Feren OS! When rebooting eject your USB or DVD and press Enter on your keyboard when Feren OS prompts you to remove your installation medium, then press ENTER.